

Welcome to the comprehensive guide on car air conditioning wiring diagrams․ This resource provides a detailed overview of electrical circuits, components, and connections for efficient AC system operation․
Learn how to diagnose, install, and maintain your car’s AC system with precision using the wiring diagram as your primary reference tool․
Importance of Wiring Diagrams for Car AC Systems
A wiring diagram is essential for understanding and working with your car’s air conditioning system․ It provides a clear visual representation of electrical circuits, connectors, and components, ensuring safe and efficient repairs․
Without a diagram, identifying faulty wires or connections becomes challenging, leading to potential electrical damage or safety hazards․ It also saves time by guiding technicians and DIYers through complex systems․
Regular use of a wiring diagram helps prevent misdiagnosis and ensures compliance with manufacturer standards․ Whether installing, troubleshooting, or maintaining your car’s AC, a wiring diagram is an indispensable tool for achieving professional results․
What a Car Air Conditioning Wiring Diagram Includes
A car air conditioning wiring diagram typically includes detailed illustrations of electrical circuits, wire colors, and component locations․ It outlines the structure of the AC system, showcasing connections between the control panel, sensors, switches, and the wiring harness․
The diagram also specifies standard symbols and codes, such as ground points, power sources, and relay modules․ Color-coded wires are clearly labeled to indicate their functions, simplifying identification during repairs․
Additionally, it may include fuse box layouts, connector pin configurations, and diagnostic trouble codes․ This comprehensive guide ensures technicians and enthusiasts can navigate the electrical system efficiently and safely, making it an essential resource for any AC-related task․
Safety Tips for Handling Car AC Wiring Diagrams
When working with car air conditioning wiring diagrams, safety is paramount․ Always disconnect the battery to prevent electrical shocks or short circuits․ Wear protective gear, including gloves and safety glasses, to minimize risks․
Ensure the system is fully depressurized before accessing any components, as high-pressure refrigerants can cause injury․ Never attempt repairs without consulting the diagram, as incorrect connections can lead to system malfunctions or fires․
Additionally, avoid touching electrical components with wet hands or while standing on conductive surfaces․ If unsure about a procedure, seek professional assistance to prevent accidents and ensure compliance with safety standards․ Regularly inspect tools and wiring for damage to maintain a safe working environment․
Components of a Car Air Conditioning System

A car air conditioning system consists of key components like the compressor, condenser, evaporator, and expansion valve․ The wiring harness connects these parts, ensuring proper electrical flow and control․
The control panel, sensors, and switches are integral for regulating temperature and airflow, while the refrigerant lines facilitate heat exchange․ Understanding these elements is crucial for effective system operation and diagnostics․
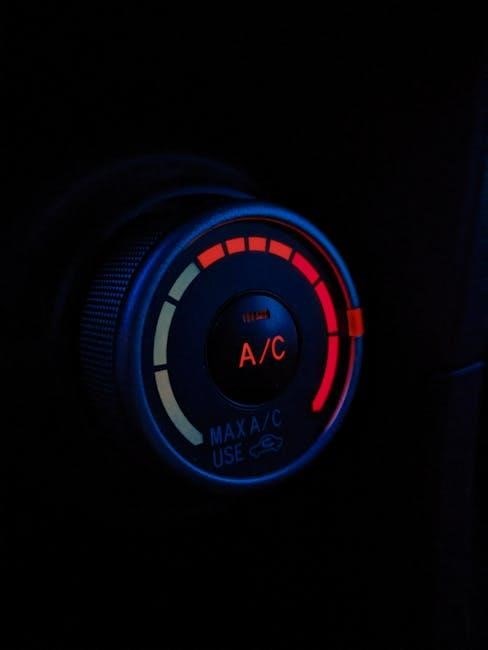
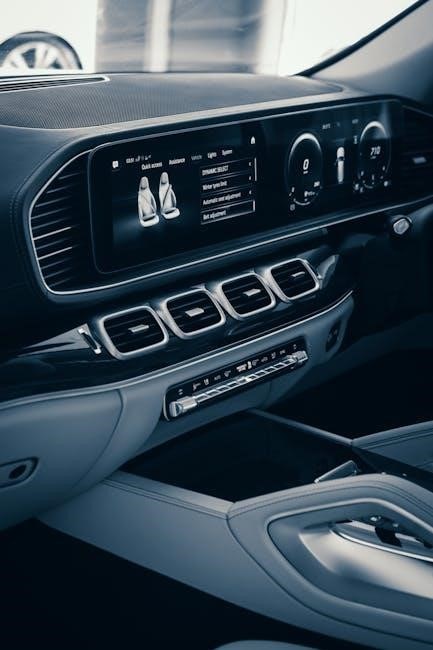
Understanding the AC Control Panel
The AC control panel is the central interface for managing your car’s air conditioning system․ It features buttons, knobs, and digital displays that allow you to adjust temperature, fan speed, and airflow direction․
The control panel works in conjunction with the wiring diagram to ensure seamless communication between components․ By referring to the wiring diagram, you can identify which wires connect to the panel’s switches and sensors․
This guide will help you understand how to use the control panel effectively, troubleshoot common issues, and interpret the wiring diagram for repairs․ Proper use of the control panel ensures optimal performance and comfort in your vehicle․
Role of the Wiring Harness in Car AC Systems
The wiring harness plays a crucial role in connecting and organizing the electrical components of your car’s air conditioning system․ It consists of a bundled set of wires, connectors, and terminals that ensure proper communication between the control panel, sensors, and other components․
The wiring harness protects the wires from heat, moisture, and mechanical damage, ensuring reliable operation․ It also simplifies the system by grouping related wires together, making installation and repairs easier․
By referencing the wiring diagram, you can identify the specific routes and connections within the harness, helping you diagnose and fix issues efficiently․ A well-maintained wiring harness is essential for optimal performance and longevity of your car’s AC system․
Sensors and Switches in the AC System
Sensors and switches are vital components in a car’s air conditioning system, ensuring efficient operation and user control․
The temperature sensor monitors cabin and evaporator temperatures, adjusting cooling levels accordingly, while the pressure sensor regulates refrigerant flow to prevent system damage․
Switches, such as the AC toggle switch and blower control switch, allow drivers to customize airflow and temperature settings․
Referencing the wiring diagram helps identify the locations and connections of these components, aiding in troubleshooting and repairs․ Proper functionality of sensors and switches is essential for maintaining optimal AC performance and driver comfort․
How to Read a Car Air Conditioning Wiring Diagram
Understand the layout and symbols in a car air conditioning wiring diagram to identify components and their connections․
This guide helps decode the diagram, ensuring accurate installations and repairs for optimal AC system performance․
Identifying Symbols and Codes
Understanding the symbols and codes in a car air conditioning wiring diagram is crucial for accurate repairs and installations․
These diagrams use standardized symbols to represent components like compressors, fans, and sensors․
Color-coded wires indicate their functions, such as power, ground, or signal lines․
Familiarize yourself with common symbols, including switches, relays, and connectors, to interpret the diagram effectively․
Codes may also specify wire gauges or circuit numbers, ensuring proper connections․
This knowledge enables you to trace circuits, diagnose issues, and perform repairs confidently․
Always refer to the legend or key provided with the diagram for clarity․
Accurate identification of symbols and codes is essential for safe and efficient AC system maintenance․
Understanding Color Codes for Wires
In a car air conditioning wiring diagram, wires are color-coded to simplify identification and connections․
Common colors include red (positive power), black (ground), yellow (signal), and blue (control circuits)․
These codes help technicians quickly trace circuits and diagnose issues․
For example, a yellow wire might indicate a sensor signal, while a red wire often carries power․
Some diagrams may use additional colors for specific functions, such as green for fan control or orange for heater circuits․
Always refer to the diagram’s legend to confirm the meaning of each color, as variations exist between manufacturers․
Understanding these codes ensures accurate repairs and avoids short circuits or system damage․
This system is essential for safe and efficient troubleshooting and installation of AC components․
- Red: Positive power lines․
- Black: Ground connections․
- Yellow/Blue: Signal or control lines․
Remember, color codes are critical for identifying wire functions in your car’s AC system․
Interpreting the Diagram for DIY Repairs
Interpreting a car air conditioning wiring diagram is essential for successful DIY repairs․ Start by identifying the components, such as the compressor, condenser, and evaporator, and their corresponding wires․
Locate the connectors and wiring harnesses to understand how the system is interconnected․ Check for any damaged or loose connections that could cause malfunctions․
Use the diagram to trace the flow of electricity, ensuring all circuits are properly routed․ If a fault is detected, refer to the diagram to pinpoint the affected wire or component․
For repairs, cross-reference the diagram with your car’s actual wiring to avoid mismatches․ Always disconnect the battery before starting work to ensure safety․
By following the diagram step-by-step, you can diagnose and fix issues like blown fuses, faulty sensors, or wiring shorts․
Remember to test your repairs by turning on the AC to confirm proper function․
- Identify components and their connections․
- Trace wiring paths for faults․
- Disconnect the battery before repairs․
This approach ensures accurate and safe DIY repairs for your car’s AC system․

Installation Guide Using a Wiring Diagram
Use the wiring diagram to guide your car AC installation․ Gather tools and materials, then follow the step-by-step process․ Disconnect the battery for safety․
Test the system after installation to ensure proper function․
Tools and Materials Needed for Installation
To install your car AC system effectively, gather the necessary tools and materials․ Essential tools include a screwdriver set, pliers, wire cutters, and a multimeter for testing connections․
You’ll also need insulated wires, connectors, electrical tape, and a wiring diagram for reference․ Ensure you have a soldering iron and heat shrink tubing for secure connections․
Additionally, keep safety gear like gloves and goggles on hand․ Refer to your car’s wiring diagram to identify specific components and connections․ Organize all materials beforehand to streamline the process․
Step-by-Step Process for Wiring the AC System
Begin by referencing the wiring diagram to identify key components and connections․ Start with the battery, ensuring it’s disconnected for safety․
Connect the positive and negative terminals to the AC control panel, following the diagram’s color-coded wires․ Next, wire the compressor clutch and blower motor, ensuring secure connections․
Install sensors and switches, such as the temperature sensor and pressure switch, according to the diagram․ Use connectors to link the wiring harness to the control module․
Test each connection with a multimeter to verify continuity․ Finally, reconnect the battery and power on the system to check for proper operation․ This systematic approach ensures reliability and safety․
Troubleshooting Common Installation Issues
When installing your car’s AC system, common issues arise from faulty connections or misread diagrams․ Always start by verifying all wires match the wiring diagram․
Check for blown fuses or tripped relays, which can halt the AC operation․ Ensure the compressor clutch engages; if not, inspect wires for damage or low refrigerant levels․
Use a multimeter to test wire resistance and diagnose shorts or open circuits․ Incorrect wire connections can lead to system failure or safety hazards․
Inspect the condenser and evaporator for blockages and clean them if necessary․ Faulty pressure switches or sensors may prevent proper function․
Review the installation steps in the diagram to catch overlooked details, like grounding wires․ Persistent issues may require professional assistance to avoid further damage․

Troubleshooting Car AC Electrical Issues
Identify and resolve electrical faults in your car’s AC system using the wiring diagram․ Check for blown fuses, tripped relays, and damaged wires․ Ensure proper connections and verify the wiring integrity to restore functionality efficiently․
Common Electrical Problems in Car AC Systems
Common electrical issues in car AC systems include blown fuses, faulty relays, and corroded connectors․
These problems can disrupt power supply to components like the compressor, condenser, and blower motor․
Short circuits, damaged wires, or malfunctioning sensors also frequently occur, leading to inconsistent cooling or complete system failure․
Addressing these issues promptly ensures optimal performance and prevents further damage․
Use the wiring diagram to trace and resolve electrical faults effectively․
Using the Wiring Diagram to Diagnose Issues
A car air conditioning wiring diagram is an essential tool for diagnosing electrical issues in your AC system․
It provides a detailed visual representation of the system’s wiring, allowing you to identify faulty components quickly․
By cross-referencing symptoms like intermittent cooling or no power to the AC controls, you can trace the problem using the diagram․
Check for blown fuses, loose connections, or damaged wires, and verify if sensors or switches are functioning correctly․
The diagram helps pinpoint where the electrical signal is interrupted, guiding you to the root cause of the issue․
This method ensures accurate troubleshooting and minimizes guesswork, saving time and effort during repairs․
Fixing Faulty Wires and Connections
Fixing faulty wires and connections in your car’s AC system requires careful inspection and repair․
Start by referencing the wiring diagram to identify the location of the problematic wire or connector․
Use tools like wire strippers, soldering irons, and crimping tools to repair or replace damaged wiring․
Inspect wires for signs of wear, corrosion, or burns, and replace them if necessary․
Ensure all connections are clean and secure, as loose or corroded connectors can disrupt the system’s operation․
When soldering, apply heat evenly and use heat-resistant tubing to protect the wires․
After repairs, test the system to ensure proper functionality․
Always disconnect the battery before starting work to avoid electrical shocks or short circuits․
If unsure, consult a professional to prevent further damage to the AC system․

Maintenance Tips for Car AC Wiring
Regularly inspect and clean your car’s AC wiring harness to prevent dirt and moisture buildup․
Ensure all connections are tight and free from corrosion for optimal performance․
Use a soft brush or cloth to wipe down wires, and apply a protective spray to shield against environmental factors․
Check for signs of wear, such as frayed wires or cracked insulation, and address them promptly․
Schedule professional servicing every 12-18 months to maintain system efficiency and prevent electrical failures․
Cleaning and Inspecting the Wiring Harness
Cleaning and inspecting the wiring harness is crucial for maintaining your car’s AC system․ Start by disconnecting the battery to ensure safety․
Use a soft-bristle brush or a clean cloth to gently remove dirt, dust, and debris from the wires and connectors․
Inspect the harness for signs of damage, such as frayed wires, cracked insulation, or corroded terminals․
If you find corrosion, apply an electrical contact cleaner to restore conductivity․
After cleaning, allow the harness to dry completely before reconnecting the battery․
Regular inspections help prevent electrical failures and ensure reliable performance․
For a more thorough check, use a multimeter to test for continuity and short circuits in the wiring․
Replace any damaged components promptly to avoid further issues․
This maintenance routine will keep your car’s AC system functioning efficiently and prolong its lifespan․
Checking for Signs of Wear and Tear
Regularly inspecting the wiring harness for wear and tear is essential to ensure reliable performance of your car’s AC system․
Look for frayed or cracked wires, which can lead to electrical failures or short circuits․
Check connectors for looseness or corrosion, as these issues can disrupt communication between components․
Inspect the insulation for cracks or damage, especially near bends or under the dashboard․
Examine the wiring near the engine and compressor for signs of heat damage or abrasions․
Use a multimeter to test for continuity and ensure there are no open circuits․
If you find any damage, replace the affected wires or connectors promptly to prevent further issues․
This proactive approach will help maintain your car’s AC system and avoid costly repairs down the line․
Regular Servicing to Prevent Electrical Failures
Regular servicing is crucial to prevent electrical failures in your car’s AC system․
Start by reviewing the wiring diagram to identify key components and their connections․
Schedule annual inspections with a certified technician to check for worn-out wires, loose connections, and corroded terminals․
Ensure the battery and alternator are functioning properly, as they power the AC system․
Replace the cabin air filter every 12,000 to 15,000 miles to improve airflow and reduce electrical strain․
Check the refrigerant level and recharge if necessary, as low levels can strain the compressor and electrical components․
By maintaining your car’s AC system regularly, you can prevent unexpected electrical failures and enjoy consistent cooling performance throughout the year․
Key Takeaways from the Wiring Diagram Guide
The car air conditioning wiring diagram serves as a primary reference for understanding and working with your vehicle’s AC electrical system․ It provides detailed insights into components, connections, and circuits, enabling accurate diagnoses and repairs․
By mastering the diagram, you can identify symbols, decode color codes, and troubleshoot common issues effectively․ Always prioritize safety when handling electrical components․
Regular maintenance and inspections are crucial to prevent malfunctions․ For complex problems, consulting a professional is advisable to ensure system reliability and safety․ This guide equips you with essential knowledge to manage your car’s AC wiring confidently․
Recommendations for Further Reading
For a deeper understanding of car air conditioning wiring diagrams, explore additional resources like repair manuals, technical guides, and online tutorials․
Visit manufacturer websites for detailed wiring schematics specific to your vehicle model․
Online forums and automotive communities often share practical insights and troubleshooting tips․
Consider enrolling in automotive electrical courses to enhance your skills․
Lastly, consult certified technicians for hands-on guidance and complex repairs․ These resources will complement this guide, ensuring you master your car’s AC wiring system effectively․
Importance of Professional Help for Complex Issues
While car air conditioning wiring diagrams are invaluable for DIY repairs, complex electrical issues often require professional expertise․
Licensed technicians possess the tools, experience, and knowledge to address intricate problems safely and efficiently․
They can diagnose faults that may not be apparent from the wiring diagram alone, ensuring long-term system reliability․
Attempting advanced repairs without proper training can lead to further damage or safety hazards․
For critical issues, consulting a certified automotive electrician is highly recommended to maintain your car’s AC performance and overall electrical health․